 Every week I hear the following questions:
- I just ordered a broadband connection. What do I need to share it among my computers?
- What do I need to use the wireless card in my laptop at home?
- I keep having to reboot my router to get my internet connection to work. What can I do to improve it?
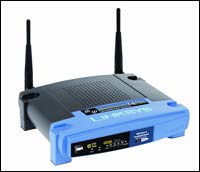
The answer to the first question is you need a router. To cover question two, you need a wireless router. Finally, to cover all three questions with one answer, you need the WRT54GL.
WRT54GL History
The story of the Linksys Wireless-G Router (model WRT54G) is the stuff of internet legend. It’s also the story of how the open source movement can produce a win-win scenario for both consumers and commercial vendors. What’s especially exciting is that tricking out this router doesn’t require any advanced skills. No soldering iron required.
The WRT54G was released in 2003 at the dawn of the 802.11g standard, with its theoretical maximum bandwidth of 54Mbps compared to 802.11b’s 11Mbps. In all respects the WRT54G is a typical wireless router – it accepts an incoming broadband link such as cable or DSL and shares it between its built-in four-port Ethernet switch and antennae for broadcasting the signal to wireless clients.
What makes this router special is that in June 2003 it was discovered that the WRT54G’s firmware was based on Linux components. Because Linux is released under the GNU General Public License, or GPL, the terms of the license obliged Linksys to make available the source code to the WRT54G firmware. Because of this Linksys released the firmware to the public in July 2003.
With the firmware now available to developers outside of Linksys, it wasn’t long before we started to see third party modifications of the firmware which extended and advanced the router’s default feature set. This went happily along until version 5 of the WRT54G hardware was released.
With the introduction of version 5 of the WRT54G, Linksys decided to switch back to a proprietary firmware based on VxWorks. They claimed this allowed them to lower the hardware requirements and memory needed for the router thus saving them money in manufacturing costs. This is all well and good but, Linksys didn’t change the model number. A lot of people that were purchasing this router to modify it at the time were confused and angered by the change. The backlash on the internet was loud enough that Linksys eventually released the WRT54GL. WRT54GL is essentially the same as the older WRTG54G v4 hardware. It still has a 200MHz processor, 4MB Flash, 16MB RAM, and runs a Linux based firmware.
Since the release of the WRT54 v5 some of the developers have figured out how to modify this version, as well as succeeding versions, all the way up to the current version 8 hardware. I would still stick to the WRT54GL as it is still the most widely supported version. I have personal performed this modification over 30 times on the WRT54GL without an issue.
What does all this history mean to you? Well it means that for a low cost investment you can buy a wireless router that covers questions one and two. You can then modify it using your choice of open source firmware to extend it’s functionality, increase it’s reliability, and answer all three questions at the same time for free. Slick.
Choosing which open source firmware to use DD-WRT or Tomato
Basically this choice comes down to personal preference. Both of these open source firmwares offer 99% of the same features. For me it comes down to this. DD-WRT offers a slightly more advanced feature set then Tomato. As a network engineer in real life this is important to me but, the average home user won’t use most of the features offered.
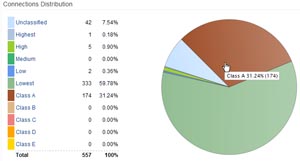 Tomato, on the other hand, offers slightly better bandwidth management in the form of QoS (Quality of Service) and bandwidth usage reporting.
So if you want every feature possible it is DD-WRT. If you want better QoS and bandwidth graphs it is Tomato. Simple.
Installing DD-WRT or Tomato
Step one. Download the latest version of the DD-WRT or Tomato firmware.
- If you are going to use DD-WRT you can download the current version here. You will need both the mini generic version and the standard generic version of the v23 SP2 frimware.
- If you are going to use Tomato you can download the latest firmware from here. The download will be a 7zip archive, so use your favorite archiver (may I suggest 7-Zip), and extract the contents.
Step two. Log into and reset your router.
 Log into your router’s interface at 192.168.1.1. By default the username is blank and the password is admin (this won’t apply if you have changed it). Go to the Administration tab and reset the factory defaults (this will help you avoid bricking your router). Then do a hard reset on your router by holding the reset button on the back of the router for 30 seconds.
Step three. Flash your router with the new firmware.
After you’ve reset your router to its factory defaults, it’s time to upgrade the firmware. You should only perform the upgrade over a wired connection. Navigate to the Administration tab, then click on Firmware Upgrade. Browse for the mini generic or the Tomato firmware that you downloaded above, select it, and click the upgrade button. While you router is in the process of updating, make sure you don’t mess with anything. I know it is hard but you can do it.
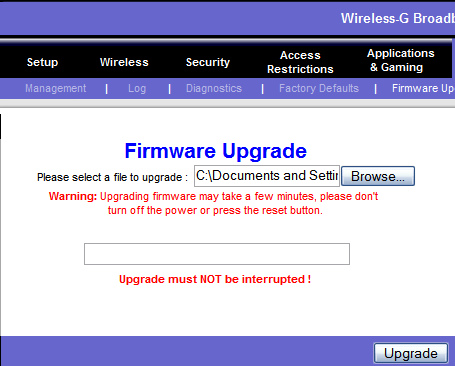
If all went well, you should see the “Upgrade is successful” screen. It’s been suggested that you should wait a few minutes after the success screen because some Linksys routers have been known to report a successful upgrade before the process is complete. If you choose to use the Tomato firmware you are done. You can navigate back to 192.168.1.1 and login with the username admin and the password admin.
Step four. Reset and upgrade your router to the standard version of the firmware.
If you navigate back to 192.168.1.1, this is your new DD-WRT Control Panel. You may notice that you’ve got a lot of new tabs and options at your disposal. Don’t change any of the settings yet.
Your new default username is root, and your password is admin.
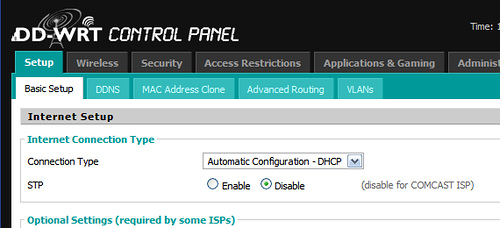
We’ve got to upgrade the firmware one more time, from the mini firmware to standard. Again go to the Administration tab and restore your factory defaults. Also perform the hard reset on the back of your router.
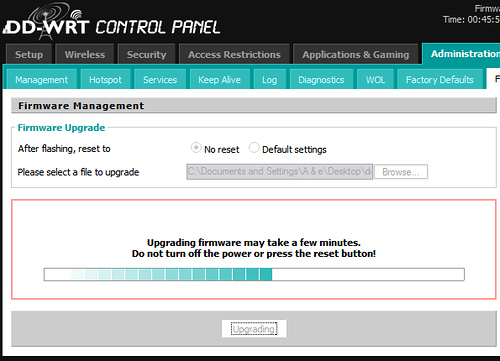
Now we’re ready for the final upgrade. Navigate to Administration -> Firmware Upgrade and browse to where you saved the standard firmware. Click Upgrade.
Again, resist the urge to mess with your computer while you are doing the upgrade. It’s important that you don’t close your browser window or turn off your router or computer while the upgrade is in process.
Once you are done you can navigate back to 192.168.1.1 and login with the username and password above. You should see the DD-WRT control panel from the previous step again. If you do, you are done. Chances are if you want your new router to do something, it can.
