 We have all been there. Its late at night and you are beat from a day of answering questions and solving problems for your coworkers. All you want to do is watch T.V. and goto bed. Then the phone rings and it is either a family member or friend who just blew up their computer downloading the latest holiday screen saver which wiped out something they need ASAP. For your sake I hope it was a cocktail recipe. Anyway, instead of trying to teach them where the My Computer icon is or the intricacies of regedit over the phone, wouldn’t be easier to take control of their system remotely and just fix it yourself. That way you can get back to your Bay Watch rerun faster. Read on for the definitive guide to remote controlling your PC.
An oldie but a goody. VNC

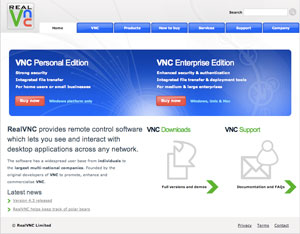
For years VNC has been the de-facto standard when it comes to free remote control of a PC. I have a VNC client on my Nokia N800 Internet Tablet that allows me to control every computer in my office from the palm of my hand. Chances are, no matter which OS you might be using, there is a VNC client and server to control it.
Step 1. Install the VNC server.
Windows users: TightVNC is a free Windows VNC server and client. TightVNC works better then other VNC servers because it allows file transfers and is optimized for slower connections. Download TightVNC from here and run the installation on your home computer. Start the server, and set a password for incoming connections.
TightVNC can be set to run as a Windows service, which means your Windows usernames and passwords can be used to authenticate on the VNC server connection.
Mac users: If you are using OS X 10.4 or higher, the remote desktop server included has VNC support. Go into your system preferences panel and select sharing. From there select screen sharing and click on the computer settings button. Check off “VNC users may control my screen” and enter a password.
If your VNC server is connected directly to the Internet, it is now listening for Internet requests on port 5900, VNC’s default port (which is also configurable). Visit WhatIsMyIP from your home computer to determine it’s IP address.
If you are behind a router then things become a little harder. You need to setup port forwarding in order for computers out side of your network to control your PC. Basically you need to forward port 5900 to the computer running the VNC server. If you are unsure how to do this, check your router documentation as it is slightly different for each router. Don’t worry. Its not that hard.
Linux users: Of course you are not left out either. From the Ubuntu wiki:
using GNOME / Ubuntu (vino)
System > Preferences > Remote Desktop
‘Check’ the first two boxes to activate the service:
Allow other users to view your desktop (view only)
Allow other users to control your desktop (view & control).
Below you can set security. The two options are:
Ask you for confirmation (ie; someone at the machine must click OK to grant remote access. This will be a problem if you plan on accessing your home machine from work or visa versa, as no one may be there to grant you access.)
Require the user to enter this password: This will require a password from anyone trying to remotely connect to your machine. This is ALWAYS a good idea.
Tip:
Make sure you choose a complex password for your VNC server. VNC isn’t the most secure software out there when it comes to login credentials.
Step 2. Install the VNC client.
On the remote Windows computer, also download and install TightVNC, but this time, start the viewer, NOT the server. If you’re on a Mac, download the free Chicken of the VNC Mac viewer to connect to your home PC. Finally, on Ubuntu Linux you can enter “vncviewer YOURIPADDRESS:0 at the terminal prompt. For Windows and Mac enter your home computer’s IP address and password to connect.
You are done. Not so hard huh?
LogMeIn. A better alternative to VNC.
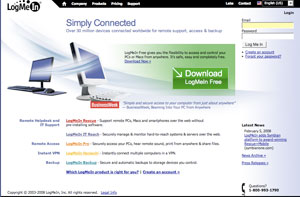
LogMeIn is generally a better alternative to VNC. It is easier to use and offers better security. The downside is that its not available for every platform under the sun like VNC is.
Step 1. Sign up for a free account at LogMeIn.com
Goto LogMeIn and sign up for a free account. Make sure you don’t use a password that you use for anything else as you will have to give this account out in order to have others install the client on their PC’s. Of course you don’t have to give your account out if you are the one installing the client.
Step 2. Install the LogMeIn client.
Once your account is setup, download and install the client for your operating system. During the install you will be asked to create an access code. Make this different then the password for your account. This way who ever logs into your account won’t have default access to all the systems listed under your account.
Done!
All you need to do in order to control a remote system is to log into your account, select the computer you wish to control, and enter the passcode you created when you installed the client.
With LogMeIn there is no need to configure your router or remember the IP address of your system. Seeing each system registers with the website when the client is launched this is all taken care of for you.
I told you it was easy.
Tip:
If you wish to change the passcode you created while installing the client at a later date, you have to remove and reinstall the client.
The end all for Linux. SSH
We all know real men/women don’t need a GUI. Almost anything in Linux can be done at the command line. Enter SSH. SSH allows secure and encrypted access to the terminal on Unix based systems like Linux and OSX.
Step one: Install the SSH server daemon.
Linux users: On Ubuntu enter the following command at the terminal prompt.
# sudo apt-get install openssh-server
Mac users: Open the system preferences panel and goto sharing. Check off remote login and setup the users you want to have this type of access.
Step two: Connect to the system.
From windows you need to download Putty. Putty is a free terminal client for Windows. For Mac and Linux users, you can simply open your terminal and type:
# ssh YOURIPADDRESS -l YOURUSERNAME
For example
# ssh 192.168.1.1 -l mike
The -l allows you to log onto a remote system using a user account other then the one you are using on the local system.
If your system is behind a router you will need to forward port 22 to the system running the SSH daemon so you can connect to the system from systems that are not on your local network. Again, check your router documentation to learn how to do this.
That’s it. Don’t be fooled. SSH is a very powerful utility. In it’s most basic form you get terminal access remotely but, it can do so much more. With it’s companion programs (scp and sftp) you transfer files between system. You can also encrypt other types of traffic over a SSH connection. For instance, you could tunnel your VNC connection over SSH to bolster the lack of security in VNC. Check out the Ubuntu community documentation to see what you can do.
