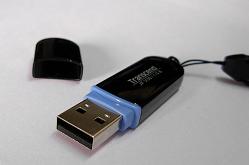
 In order to create a bootable USB Flash Drive, you will need some knowledge of computers. I will attempt to make these directions as simple as possible, but even I can be a bit obtuse at times. (Who said that?) Also note that there are other ways to do this, but I am going to share the way that I know works. Here’s how to create a bootable USB flash drive.
Requirements:
- A USB drive of any size. (I used 1 gig)
- A computer with a BIOS that allows booting from a USB port.
- A Bootable floppy disk or CD. (you can use an old Windows 98 bootable CD or floppy disk for this.
- Any Utility that allows you to create partitions, set active partitions, create a master boot record, and transfer the boot files to the active partition. (I used FORMAT and DOS FDISK that are on the Window 98 CD)
Directions:
Part I:
In your systems BIOS, make the USB drive the first in the drive sequence.
Why? In this case, fdisk does not allow for a partition to be set as ACTIVE (bootable) unless it is the first drive. In order for your computer to boot to your OS, your harddrive is set to be the first drive. This needs to be temporarily changed.
How? There are three ways to do this. You only need to do one of the three ways, whichever one works for you. All of them require that the USB drive be plugged into the PC before you turn the PC on. Also take note of the options you are going to be changing, so when you are done, you can set the system back to the way it was originally.
- Bios** drive sequence: Depending on your BIOS, there may be a way to change which device the computer looks at first. If there is, select the USB flash drive as the first in the list.
- Disable the other drives: In the BIOS, turn your harddrive, to the off or none setting. Your harddrive might be labeled “Primary Drive 0” “Auto” or “On” Change it to “off” or “none”
- Unplugg the hard drive(s): Use this option if your BIOS doesn’t have an option to change the drive sequence or to turn off the hard drive. Please make sure you know what you are doing here. If you are not sure exactly how to do this, look it up in google. Be Aware: Opening your computer case may result in voiding your computer warranty or damaging your hardware.
** Please note that many BIOSes are different and the wording will vary from one to another.
Part II:
- Boot the PC from the boot floppy/CD (Windows 98 floppy/CD) into the command prompt with the USB drive plugged in.
- Once in the command prompt, run fdisk
- If a primary partition already exists on the USB Drive, Goto step 4 below. If it doesn’t or you don’t know, use fdisk to create one. If for some reason you aren’t able to, make sure that the USB drive is set to be the first in the drive sequence in the BIOS.
- Use fdisk’s “Set Active Partition” (option 2) to set the primary partition on the USB Drive to Active.
- Exit fdisk
- Reboot the PC from the boot floppy/CD (Windows 98 floppy/CD) into the command prompt with the USB flash drive plugged in.
- At the command prompt enter the following command: dir c: This step is to verify that the C: drive is actually the primary partition on the USB Drive. Regardless of the result that the command generates, the important thing to note is to make sure that the size of the primary partition on the USB drive is roughly equal to the sum of the empty space and the used space. Refer to Part I
- Format and copy the boot files to the primary partition. At the command prompt, from the directory (on the Windows 98 CD/floppy) where FORMAT.COM is located, enter: format /s c:
- Run fdisk /mbr This writes the master boot record to the USB drive without altering the partition table information.
- Restart the PC and choose booting from the USB drive. If all goes well, you should see a C:> command prompt.
- Now your flash drive is bootable, however please remember to reset your PC settings back to their original settings.
